
The User Guide for Intel® Compute Stick STCK1A32WFC helps you setup and use your Compute Stick.
Click or topics for details:
Hardware
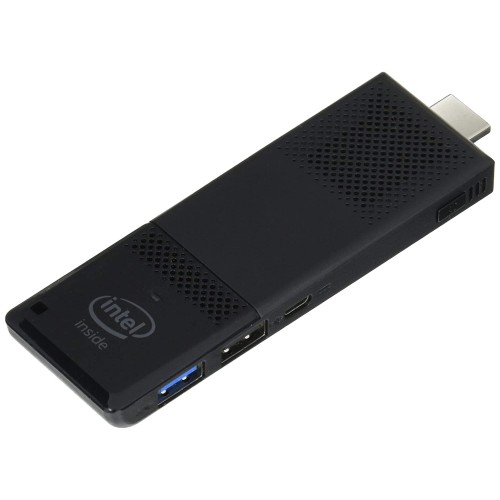
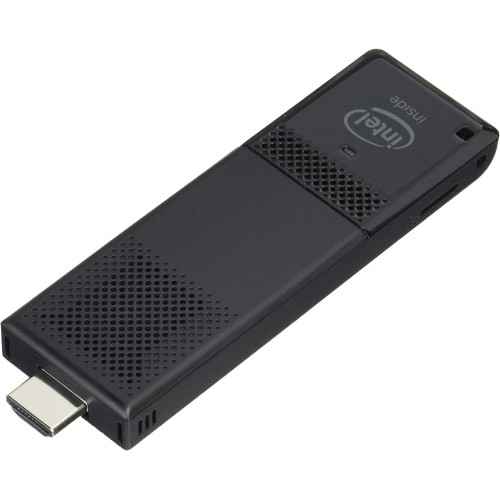
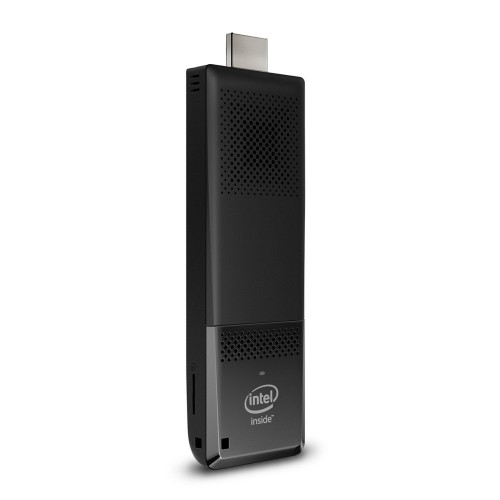
Product Description
| Symbol | Description |  |
| Security | Security cable opening | |
 | USB 2.0 port | |
 | Power connector | |
 | Power button | |
| HDMI* | HDMI connector | |
| Micro SD* | Micro SD memory card slot | |
| Power LED | Power LED—blue |
Connect directly to a display
Plug the Intel® Compute Stick directly into a standard HDMI port on a television or monitor.
The Intel® Compute Stick extends about 4 inches (102 mm) out from the HDMI port.

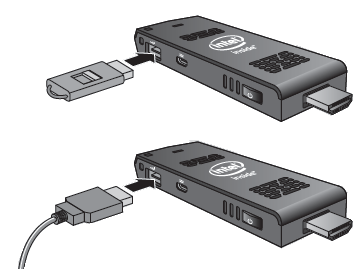
Connect to a display with the HDMI extender cable
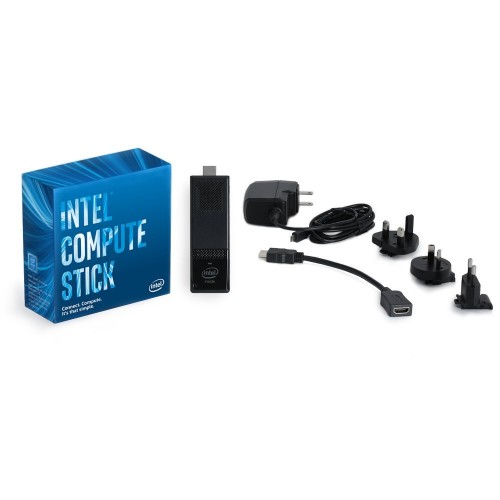
If space is limited around the HDMI port, use the flexible HDMI extender cable that came in the box.
- Plug the Intel® Compute Stick into the female end of the extender cable (A).
- Plug the male end of the extender cable into the HDMI port on the television or monitor (B).

Find compatible televisions and monitors at the Intel Product Compatibility Tool.
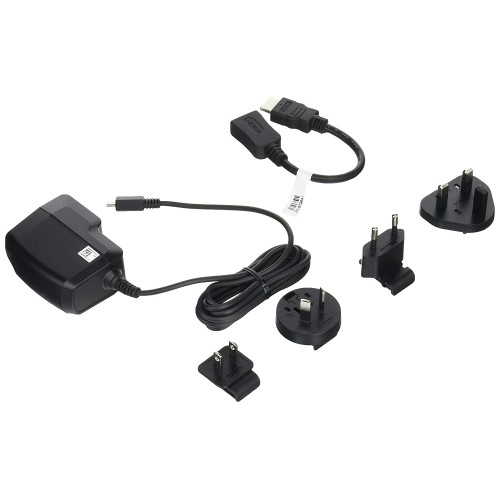
To power the device
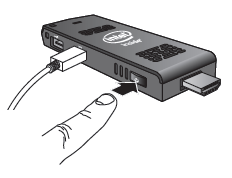
To use the AC Adapter
Connect the power adapter to the Intel® Compute Stick as shown. 
| Note | Intel Compute Sticks start automatically when power is applied. |
Shut down the Intel Compute Stick with the normal shutdown process for Windows* 8.1.
To power-up the device again, press the power button on the side of the Intel Compute Stick.
To use the USB Port
If a television or monitor has an HDMI port and a USB port, use the USB port to power the Intel Compute Stick.
Intel Compute Sticks are designed to use up to 10 W of power. If the television's USB port can supply enough power, you can use it to power the Intel Compute Stick. A USB 2.0 port normally supplies 2.5 W of power.
Try to power the Intel Compute Stick with a USB port:
- Connect the small end of a 3-foot USB cable into the power connector on the Intel Compute Stick.
- Plug the standard USB end of the cable into the USB port on the TV or monitor, instead of plugging it into the AC power plug.
Caution | Do not power Intel Compute Sticks with an AC power adapter and a USB port at the same time. |
If the USB port does not supply enough power, these are the likely symptoms:
- It will not turn on.
- It turns on, but does not complete the boot process.
- It turns on, but the operating system does not load.
- It turns on and the operating system loads, but it performs very slowly, reboots, or locks up.
Connect a keyboard and mouse
Intel® Compute Sticks supports the following:
- USB wireless keyboard and mouse, with a USB dongle.
- USB wired keyboard and mouse, with a USB hub.
- Bluetooth* keyboard and mouse.
- Follow the instructions that came with the keyboard and mouse to pair them with the Intel Compute Stick.
| Note |
|
Wireless keyboard and mouse connection example: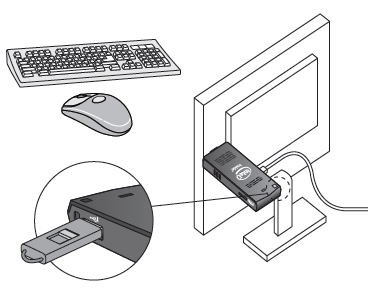
Bluetooth keyboard and mouse connection example: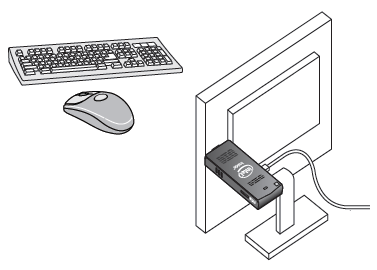
| Note | Keyboard and mouse are not included. |
Find compatible keyboards and mice at the Intel Product Compatibility Tool.
Use the USB 2.0 port
Use the USB 2.0 port to:
- Install software from a CD or DVD in a USB optical drive.
- Back up or access media files (such as music and photos) on an external USB flash drive.
| Note | USB flash drive and USB cable are not included. |
Find compatible USB devices at the Intel Product Compatibility Tool.